DIY Pallet Outdoor Sofa for Small Balconies: Step-by-Step Plans
A pallet sofa is the rare DIY project that looks good, costs little, and fits a balcony the size of a bath mat. Two standard pallets side by side give you a seat about 160 cm wide and 80 cm deep, which is enough for two adults and a tray of drinks. The build takes a weekend, most of it drying time, and the only real skill required is the willingness to sand properly and screw straight.
Here is the plan I would hand a friend who has never built anything: dimensions, a cut list in plain language, and the cushion and finish choices that decide whether the sofa lasts three summers or ten.
Measure the Balcony Before You Touch a Pallet
Start with painter's tape. Mark the sofa footprint on the floor and stand inside it. You want at least 60 cm of clear walking space around the seat and 5 cm of air behind it, so damp air can move along the wall. On a narrow balcony, 80 cm of depth is usually the maximum that leaves room to pass. If it doesn't work, cut the pallets down to 60 cm deep with a saw and keep the full width.
Two other things worth checking: whether your building has rules about permanent furniture on balconies, and how much weight yours can take. A finished pallet sofa is heavy and awkward to move. On an older or cantilevered balcony, ask your building manager before you commit.
What You Need
Materials
- Two or three heat-treated pallets (look for the "HT" stamp)
- Exterior wood screws, 50–60 mm, stainless or coated
- Exterior wood glue
- 80-grit and 120-grit sandpaper
- Exterior deck oil or stain
- High-density foam, 10 cm thick
- Outdoor fabric or ready-made outdoor cushions
- Felt pads or furniture glides
Tools
- Pry bar and hammer, or a reciprocating saw
- Drill/driver
- Random orbital sander (or a lot of patience)
- Tape measure, carpenter's square, pencil
- Safety glasses, work gloves, dust mask
Pick Pallets You Would Sit On
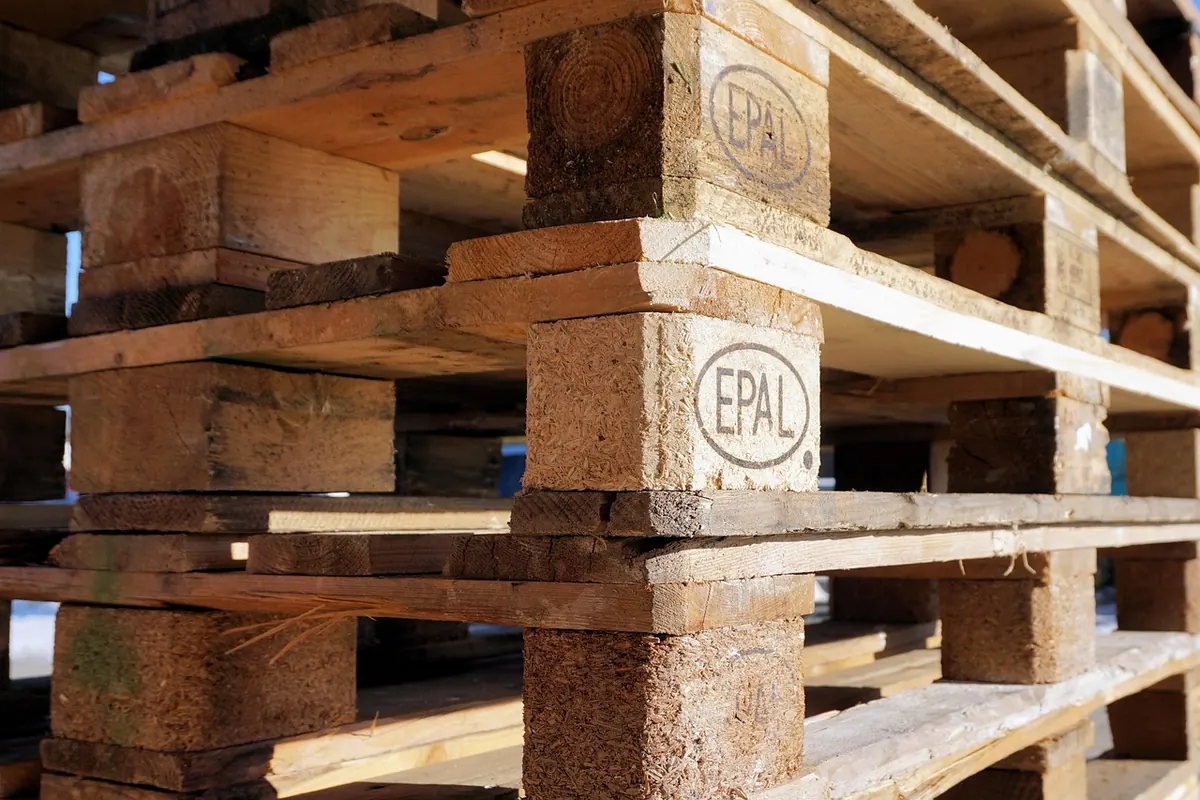
Pallets are treated wood, and not every treatment is something you want against your legs in July. Check the IPPC stamp on the block: HT means heat-treated, which is what you want. MB means methyl bromide, a fumigant, so skip those. Also pass on any pallet that is stained, painted, oily, or smells chemical.
Once you have two clean pallets, break one down to get spare deck boards for the backrest. Slide a pry bar under each board and work along the length, or cut the nails with a reciprocating saw. Pull every nail, then run a magnet over the wood. You will be handling and sanding these boards a lot.
The Build, Step by Step
- Prep the pallets. Sand the top deck of both pallets with 80-grit, then 120-grit. Round the front edge slightly, where knees and calves will rest.
- Join the base. Set the two pallets side by side with the deck boards running the same direction. Screw them together through the blocks in four places, top and bottom, with glue on the mating faces. Check for a flat, non-rocking surface before the glue sets.
- Set the height. A standard pallet is about 14 cm tall, and a comfortable seat is 40–45 cm to the top of the cushion. Add blocks or casters if your cushions are thin. Short glides keep the sofa low and casual; taller legs make it feel more like furniture.
- Add a backrest. Cut a third pallet to about 45–50 cm and screw it upright along the back edge, or build a simple frame from four deck boards. Tilt it back 5–10 degrees by shimming the bottom. A perfectly vertical back feels like a bench after ten minutes.
- Brace and test. Sit on it. Rock it. Add corner brackets at the back and a diagonal brace if there is any flex.
- Sand everything again — arms, edges, the top of the backrest — then wipe off the dust.
- Finish. Brush on two thin coats of exterior deck oil or stain, following the drying time on the can. Oil soaks in and is easy to refresh; film finishes look shinier but can peel. Do this before the cushions go on, and let it cure fully.
- Add glides. Felt pads or plastic glides protect tile and stop the scraping noise when you slide the sofa to sweep.
Cushions Decide How Much You'll Use It
Thin foam over slats feels exactly like sitting on slats. Buy high-density foam 10 cm thick, or two 5 cm layers, and cut it 1–2 cm wider than the frame so the edges don't gap. If your balcony is uncovered, choose dry-fast foam and fabric rated for outdoor use, such as solution-dyed acrylic. Standard upholstery foam soaks up rain and stays wet inside for days.
A setup that works well on most small balconies:
- One seat cushion in two pieces rather than a single slab, so it is easier to flip, dry, and store.
- A separate back cushion or two, plus a small bolster for lower-back support.
- Zippered covers, so you can wash them without unpicking seams.
- A deck box, because the fastest way to ruin outdoor cushions is leaving them out through a wet week.
Where pallets shine: the gaps between deck boards drain water instead of pooling it. Keep that advantage by not covering the entire top with a waterproof sheet, and by tilting the sofa a hair toward the outside edge of the balcony.
Finishing Touches and Small Adjustments
Stain or oil in a tone close to your railing or floor; pallets look best when the grain still shows. A small side table made from one cut-down pallet, a hook for a lantern, and two weatherproof throw pillows finish the corner without crowding it. If the balcony is overlooked, add a low planter at the open end. It blocks sightlines and makes the sofa feel like part of a room.
Refresh the oil once a year, tighten the screws each spring, and check underneath for soft spots after winter. Wood that stays wet will eventually rot, and a 5 cm gap from the wall plus a few sunny afternoons do most of the prevention work.
A Weekend, Two Pallets, and a Place to Sit
Build the base first and live with the bare frame for a few days before buying foam. You will notice things a tape measure cannot tell you — that the backrest wants another 5 degrees of tilt, or that a 150 cm seat leaves a better walkway than 160 cm. Once the frame is right, cushions and finish go quickly. Then the real point of the project arrives: a coffee, a book, and a balcony that finally feels like somewhere to be.
Photo: webandi / Pixabay